How to create an SSH key pair to connect to gitlab or github on mac os, windows or linux
Primary Goal
Make automatic connections on gitlab or github with git pull, git push, git clone using SSH protocol without needing to enter credentials (password). Also useful for using a webhook that updates the software on the server whenever there is a commit on the master/main branch.
Project Requirements
- Terminal / Command Prompt access (command line)
- A Gitlab or GitHub account
How to create SSH key for automatic authentication in github or gitlab?
Basically the steps are very simple, whether for windows, mac or linux:
- Open terminal (linux and mac) or command prompt (windows)
- To create SSH key with RSA encryption, use the command: ssh-keygen -t rsa -b 4096 -C “myemail@email-example.com“
- You will be asked 3 questions: where to save the SSH key pair, passphrase to access the key (optional), and to confirm the entered passphrase
- To access the content of the created public SSH key:
- On linux or mac, use the command: cat ~/.ssh/id_rsa.pub
- On windows: type “%userprofile%\.ssh\id_rsa.pub”
- Copy the created public ssh key text (id_rsa.pub) and install/configure (paste the key text) in the github or gitlab ssh key configuration field
- Do not let anyone access your private ssh key (id_rsa) and keep it safe at all times
Below we will explain in detail the step by step and the how to create ssh key pair, with images and explanatory text.
Step 1: Open command prompt or terminal application with desired user
The first step is to open the command prompt if you are using Windows Operating System or the Terminal if you are using the Mac OS or Linux.
Make sure you are using the correct user that you want to authenticate (for creating the SSH key pair). Remember to avoid using the root user (if you use Linux).
Step 2: Create a new ssh key pair
With the prompt or terminal open, let’s use the ssh-keygen command to generate a key pair with 4096-bit RSA encryption and insert, together with the key, a text string informing the e-mail linked to the key (using the same e-mail address that you use in your githu, gitlab or bitbucket account is a good practice):
ssh-keygen -t rsa -b 4096 -C "myemail@email-example.com"
After running the command, three questions will be prompted:
- The first is where you would like to save the created key. It is recommended to save in the default folder (leave it blank and press ENTER).
- The second question is related to creating a password (passphrase) to access the key.
- The third question is to confirm the chosen password.
Regarding the first question after running ssh-keygen: Select the location where you want to save the ssh key. If you press enter (without writing anything), it will be saved in your home folder, which can be:
On Windows:
C:\Users\yourusername\.ssh\id_rsa.pub or "%userprofile%\.ssh\id_rsa.pub"
On Linux and MAC OS, the path is:
~/.ssh/id_rsa.pub
Regarding the second question: – So, do I need to setup a password/passphrase to access the ssh key or not? It is interesting to take into account some points:
- If you are strict about storing your keys securely, and don’t want to have to type your password every time you connect or commit, then it’s better not to set a password.
If security is an extremely important variable, especially if you work with production servers, or private repositories with sensitive information, for security reasons, it is recommended that you configure a password/passphrase.
Use case example:
- If you create your keypair without a linked password, the process of connecting to your server or repository is very quick, as there is no longer any need to enter login and password credentials. Its use is also very common in automated processes, if you have a cron job configured that needs to make an ssh connection.
- Adding a password to your key can provide an extra layer of security. The reason is that if a hacker manages to access your key pair, he will not be able to connect directly to your server or repository; it will still need the password.
The third question is related to confirmation of the chosen password.
A fingerprint of your computer/server (key fingerprint) will then be generated.


Step 3: Paste the public SSH key to your GitHub or Gitlab account
In order to setup your SSH key on Gitlab, Github or Bitbucket, you need to access the content of the id_rsa.pub file (which is your public key). The bellow command will show your generated public key on the screen:
On Linux and MAC OS, the command is:
cat ~/.ssh/id_rsa.pub
On Windows:
type "%userprofile%\.ssh\id_rsa.pub"
The beginning of the key must start with ssh-rsa and end with your chosen email address. Now select you public key text and copy to the clipboard.
Step 4: Configure Github and Gitlab
In the previous step we copied the contents of the id_rsa.pub file to the clipboard. In order to configure our SSH key authenticated access on Gitlab or Github, we need to “install”/configure this public ssh key on the platform.
If you want to use a key in the ed25519 standard or instead of RSA, just generate it with the steps below:
ed25519 algorithm
An alternative to SSH key creation is to use the ed25519 encryption algorithm instead of RSA. To create the key pair with this algorithm, use the command:
ssh-keygen -t ed25519 -C "my-email@email-example.com"
The path to the public key is the same, but now it has the name linked to the algorithm:
On Linux and Mac OS:
~/.ssh/id_ed25519.pub
On Windows:
C:\Users\yourusername\.ssh\id_ed25519.pub or "%userprofile%\.ssh\id_ed25519.pub"
To view the contents of the public SSH key, use the command:
If you are using Linux or Mac OS:
cat ~/.ssh/id_ed25519.pub
Now if you are using Windows, use the command:
type "%userprofile%\.ssh\id_ed25519.pub"
If you have any questions or suggestions, write them in the comments! I will do my best to answer!
Step by step on how to configure SSH key in Gitlab
Create a new repository in gitlab
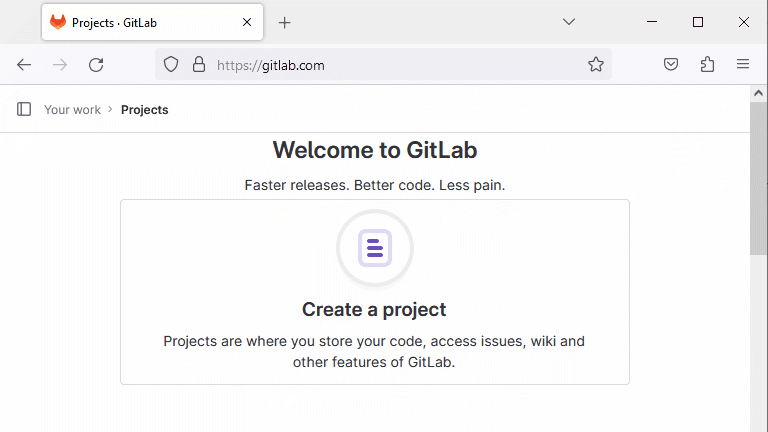
In this example, we will first show you how to create a new project, or new repository. On the Gitlab home screen, (after logging in), click on the option:
Create a project
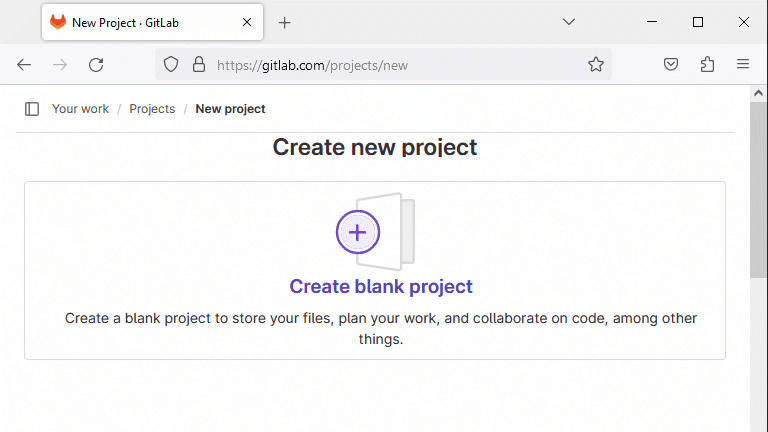
Then choose the type of project you want to create. In this example we are going to create a blank repository, so let’s choose:
Create a blank project
Now we are on the new repository configuration screen. In this example we will choose the name “repo-gitlab“, in reference to a repository that we will configure in gitlab. The project slug is how the name of your project will appear in the url of the page, it is automatically generated according to the chosen name, but it is possible to change it. We’re not going to set up a deployment, so check:
No deployment planned
This repository will be private, so only the owner of the repository and whoever he grants access will be able to see its contents. We are already going to configure the repository with a README file automatically, because this way we can already make a clone on our computer and test it.
When everything is ready, click on the button:
Create project

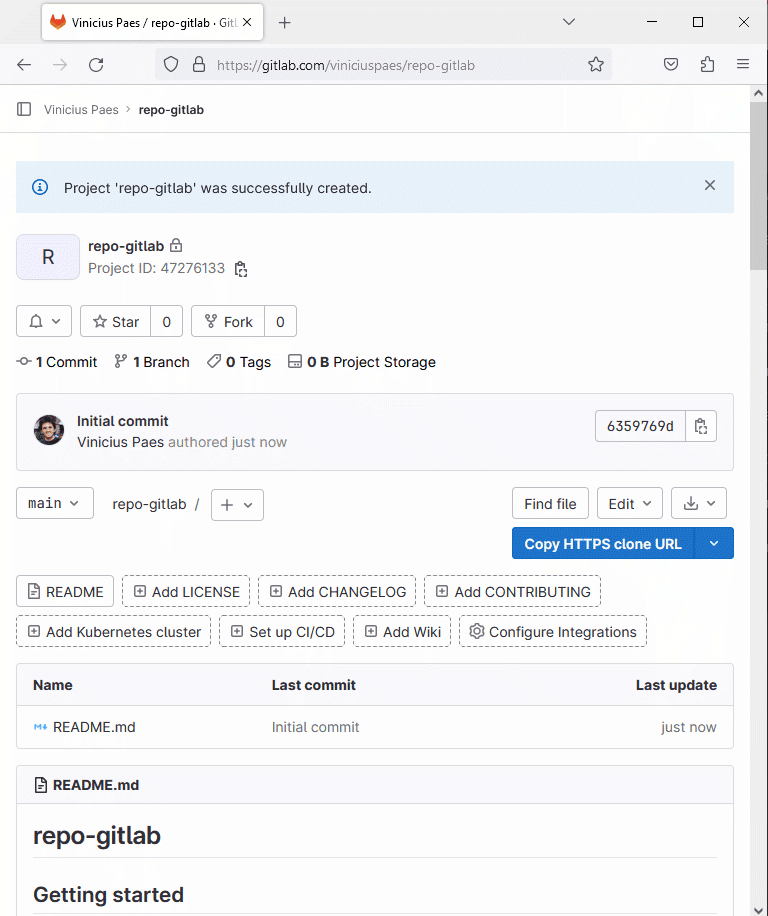
In this example, we have the project/repository created as in the image below:
Add SSH key to gitlab
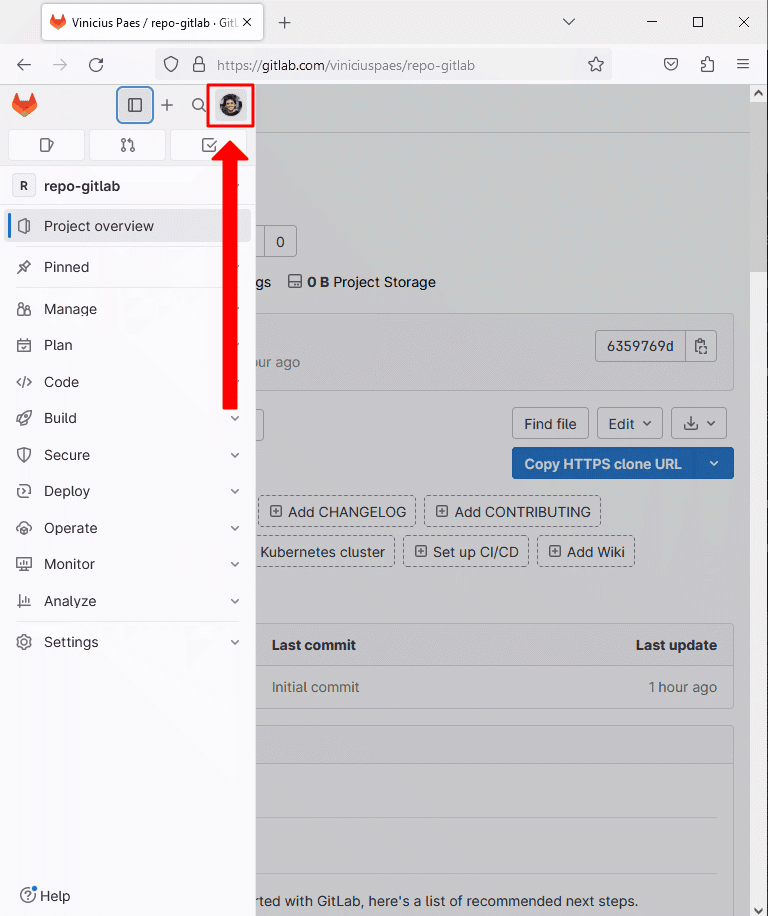
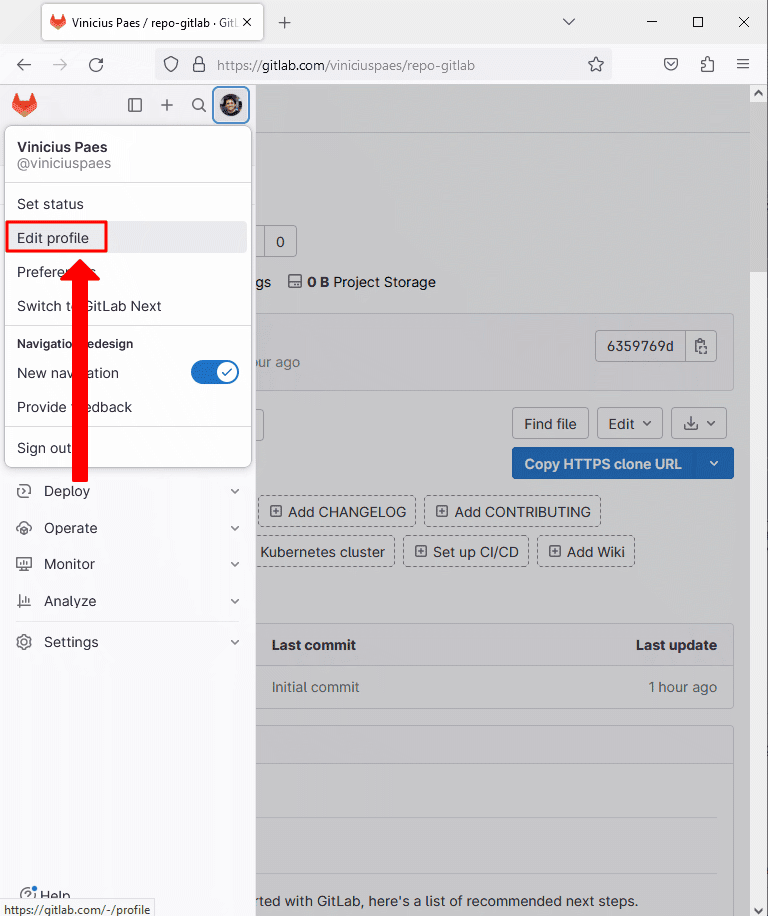
One of the most important parts of configuring your repository’s integration into your development environment is configuring your public SSH key so that you can speed up the commit process. SSH key settings are within your personal profile menu. So first we need to click on our photo icon, as in the image below:
Now choose the option:
Edit profile
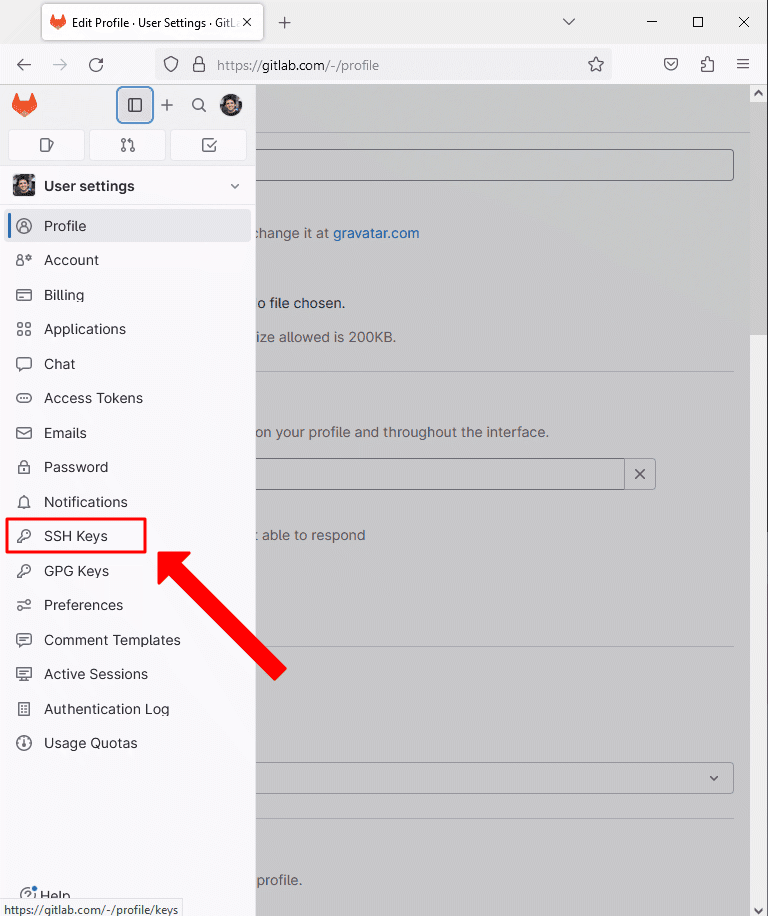
Now we are inside our profile page. Notice that now the options in the left menu are different. Let’s choose the option:
SSH Keys
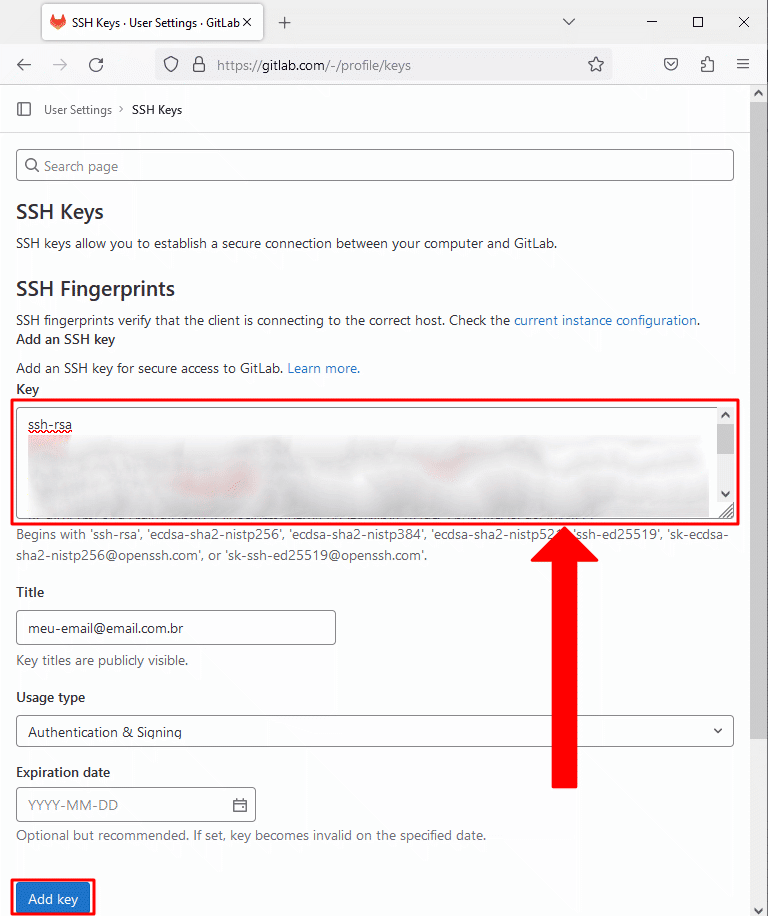
We are now on the public SSH key configuration screen. Copy your generated key (content of id_rsa.pub) on your personal computer and paste it in the text field, as shown in the image below. Then click on:
Add Key
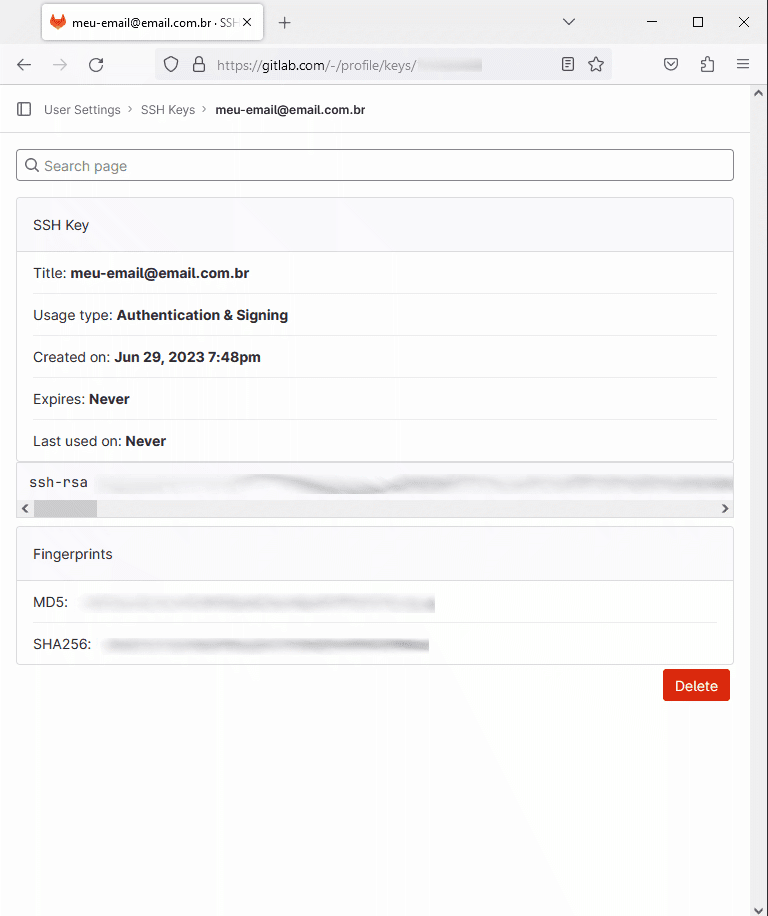
All done! New public key configured successfully! You will have a confirmation image and a summary of your key data, as shown in the image below:
Step by step on how to configure SSH key on Github
As we showed in the example above, the process to add an SSH key in github is very similar to what was done in gitlab.
If you already have a repository created, you can also try cloning it on your personal computer to perform commit tests.
Add SSH key to gitlab
The process to add your public ssh key on github is super simple. The first step is to click on your profile picture in the upper right corner. When clicked, the menu will appear.
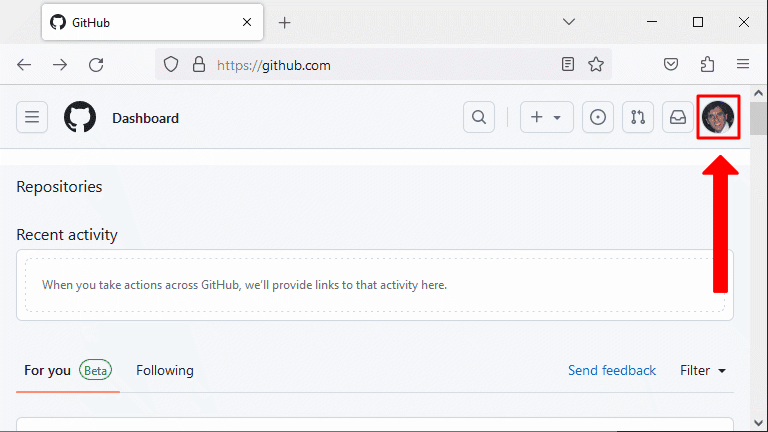
In the menu, select the option:
Settings
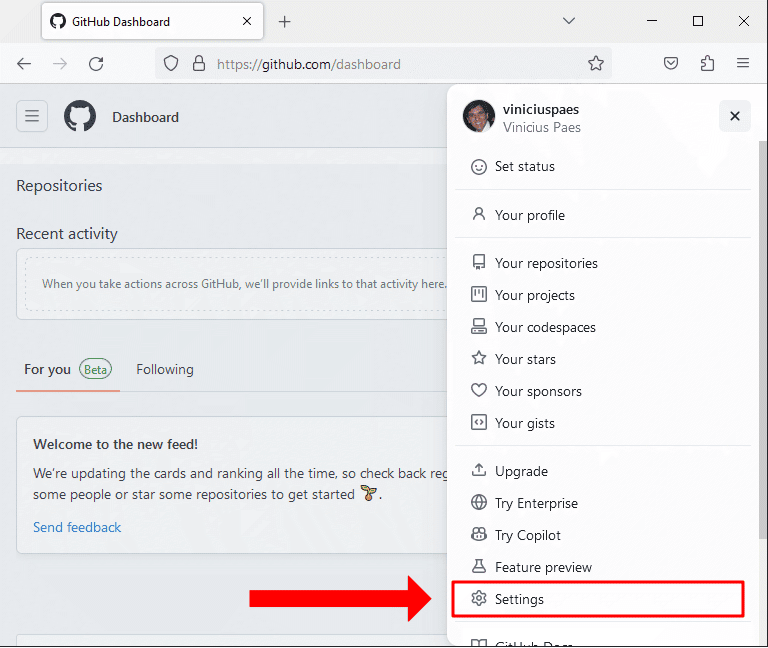
In the settings page, select the bellow option available in the left menu bar:
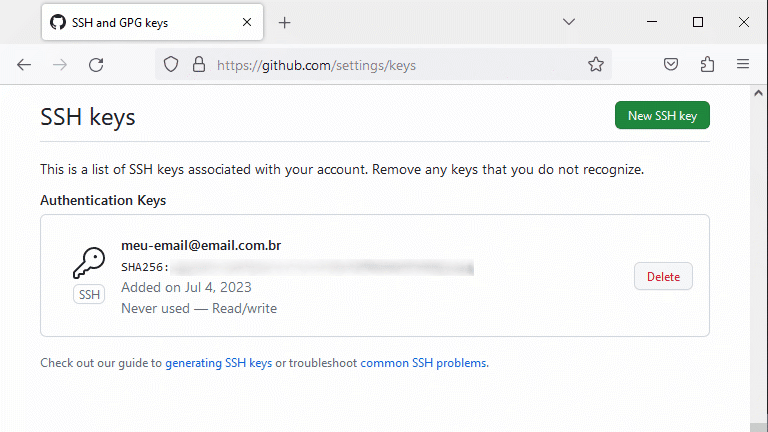
SSH and GPG keys

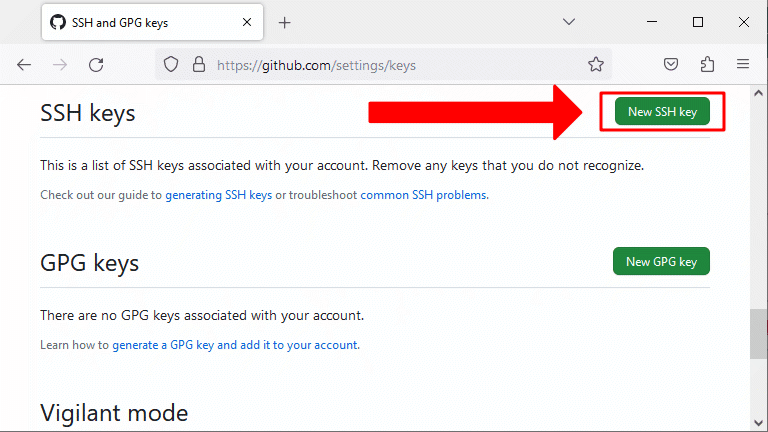
Now just look for the “SSH Keys” session and click on the green button:
New SSH Key
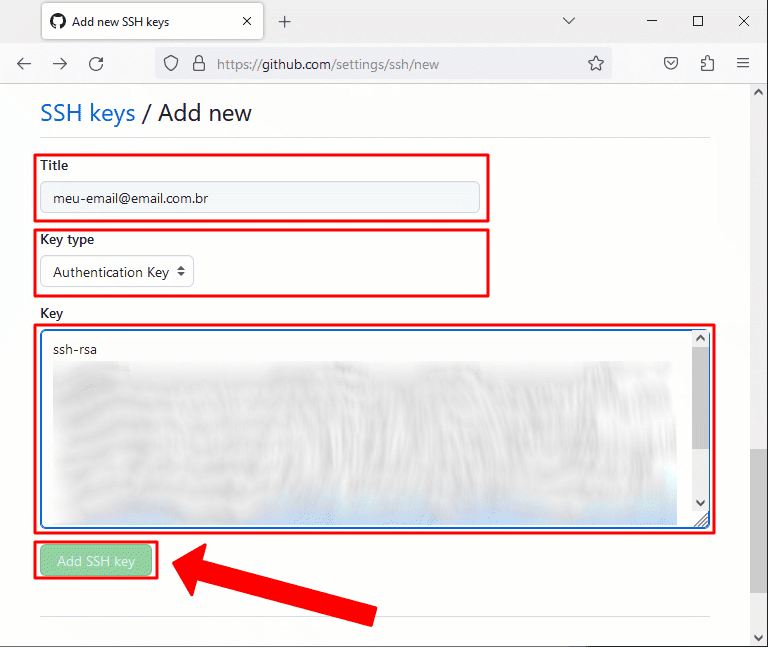
Now choose a title for your key, which is basically a name, so you can remember the purpose or origin of that key. The key type in this example it will be:
Authentication key
Now we need to put the contents of our public ssh key into the “key” text field.
To finish the key setup, click on:
Add SSH key
All set, new public ssh key successfully registered on github. The image below illustrates the registered example key:
Configure Git personal computer/workstation
So that we can set up our repository on our personal computer or workstation, it is first necessary to perform an initial configuration in git. If you don’t have git installed on your computer, just access the project’s official website to download and install it:
https://git-scm.com/downloads
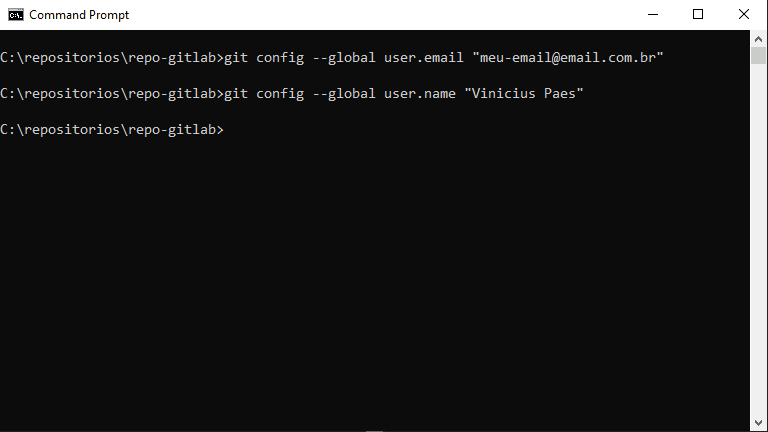
With git installed, we basically need to configure some personal data like email address and username.
To configure the user’s email address in git, use the command from the prompt or terminal:
git config --global user.email "myemail@email-example.com"
To configure the username, use the command:
git config --global user.name "Vinicius Paes"
Remember to update the email and username in the examples above to your personal details.
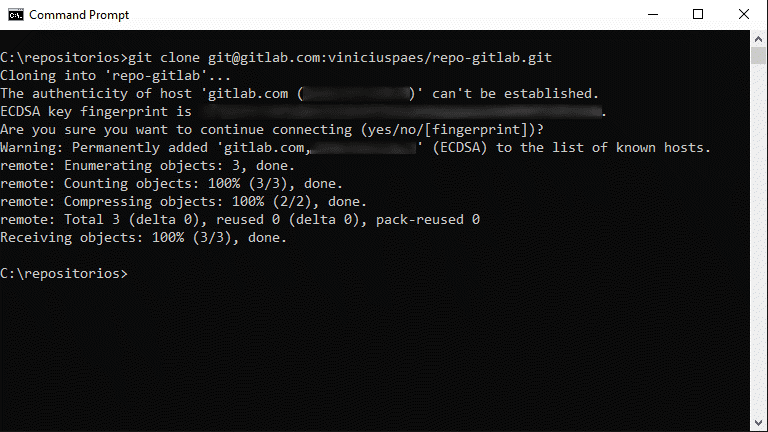
How to clone a repository, add files, commit and push with ssh key authentication
First, to clone a repository with SSH, we need its URL. In your repository page it is possible to extract this information. In our example, we created the repository called “repo-gitlab“, and we are using the username viniciuspaes. So our URL and command to clone looks like:
git clone git@gitlab.com:viniciuspaes/repo-gitlab.git
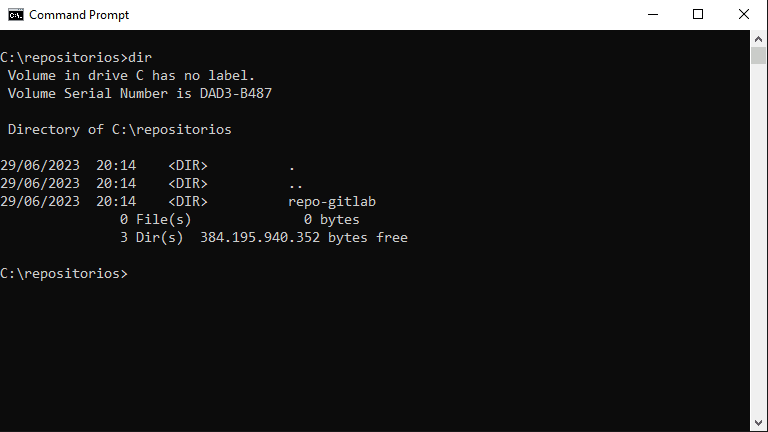
After cloning the directory, we can verify it with the command:
dir
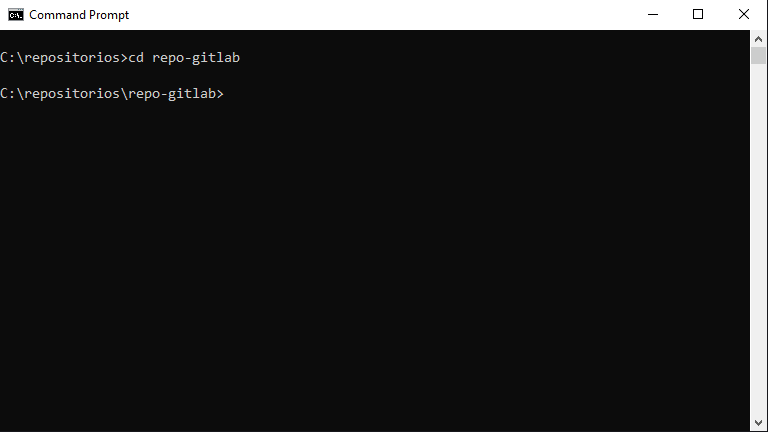
To navigate into the repository, use the command:
cd repo-gitlab
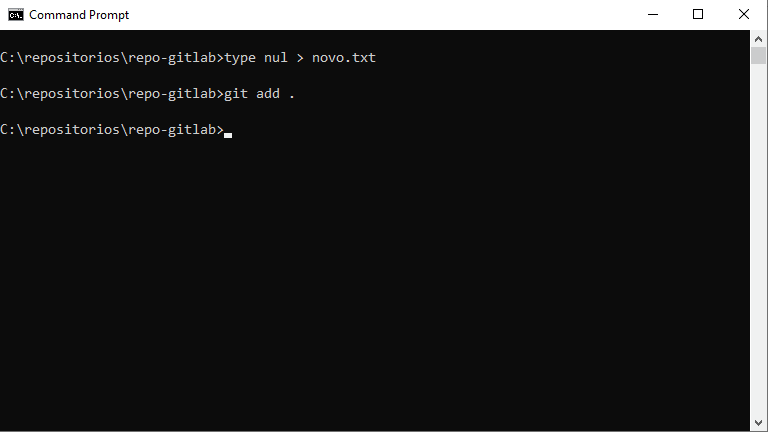
To test the commit/push functionality for the main branch, let’s create a “new.txt” file:
type nul > new.txt
Now add the file to the commit list:
git add .
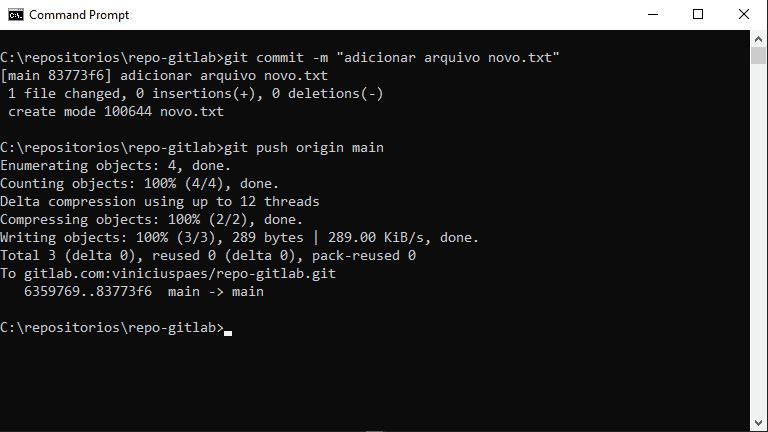
Now we need to add a message to our commit, so we use the command:
git commit -m "add file new.txt"
All done, we can use the push command to update the main branch with the new file created:
git push origin main
If everything went well, we can see in the gitlab interface that the new file has been added, as illustrated in the image below:
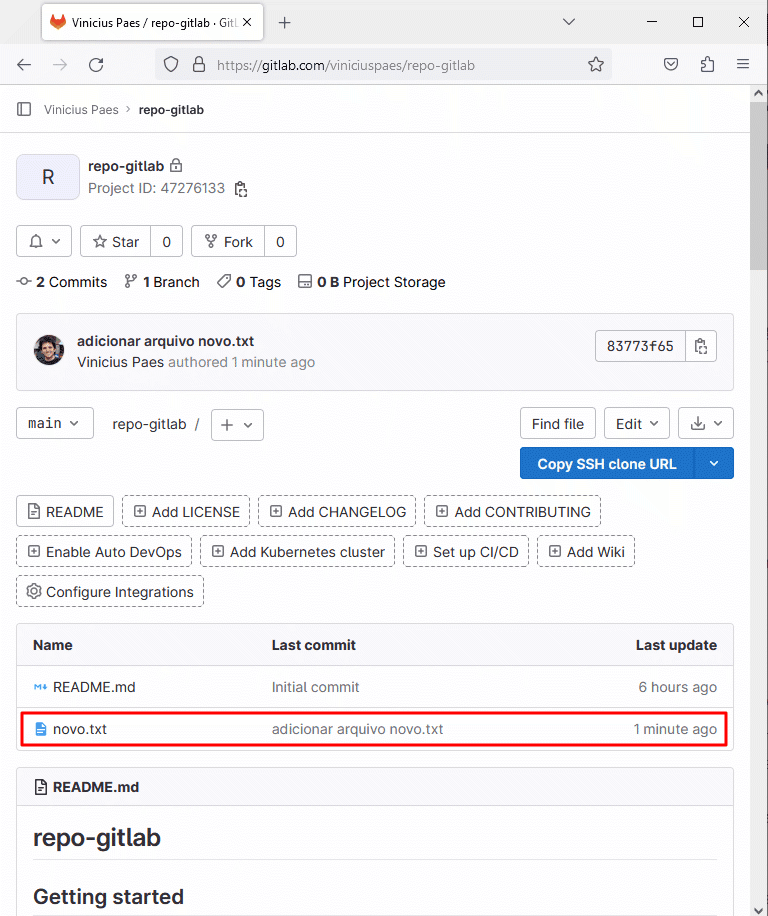
And everything is ready! SSH key pair created, git configured, gitlab configured, github configured, repository clone example done, add new file and commit/push performed via command line!
Did you like this tutorial, was there any information missing or did you have any questions? Write it down in the comments!